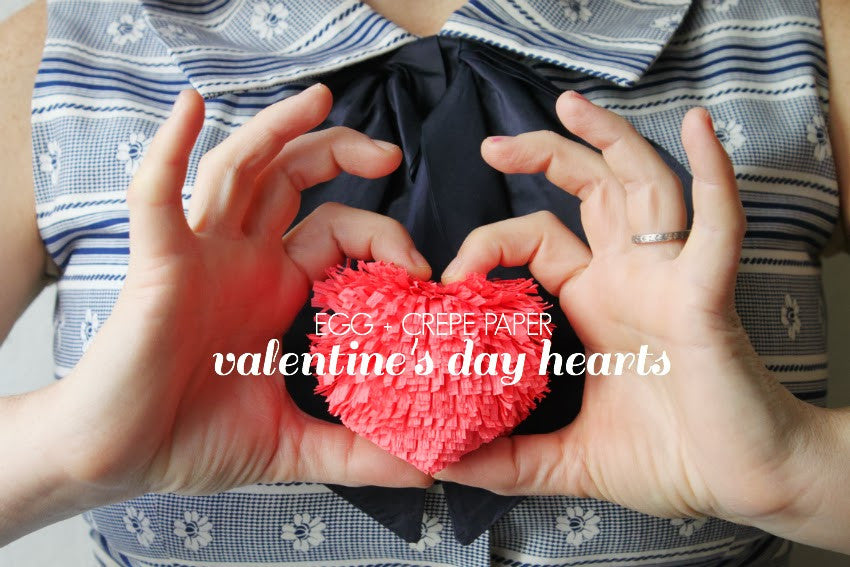

Love is certainly in the air and Carte Fini is enamored with our favorite featured artist, Tiffanie Turner of papel SF and corner blog, who returns this month to tempt us all with her loveable creation...check it out, and most of all Happy Valentines Day!
 Type A and B
I'm really excited to be back in the new year with another seasonal DIY project! I have created some clever little valentines using gorgeous Carte Fini crepe paper and blown-out chicken eggs. (Remember these woodland ornaments?) This time I'm using two eggs, nestled together to form perfect little three-dimensional hearts, covered in Valentine's Day-hued papers. There is no better time of year to surround yourself in the array of pinks, corals and reds that Carte Fini offers. I used so many, because I can't get enough.
TYPE C and D


These little hearts don't take very long to make, and would be great individual valentines (with or without a love note hidden inside), or strung up into a very unique and festive garland. 
Here is a list of the supplies you will need. You won't need all of these items for each kind of heart. See the individual tutorials below before you decide what materials you will want to use.
- Assorted 180 gram crepe papers rolls from Carte Fini
- Blown out jumbo chicken egg shells (see tutorial for these here)
- Hot glue gun and glue sticks
- Tacky glue
- Large and small paint brushes
- Scissors
- Upholstery needle (helpful but not necessary)
- Embroidery thread, twine, or fishing line for hangers
- Tiny pompom trim or other thin fun ribbon or fringe
- A small amount of chip board
- Love notes and homemade confetti
As far as the colors I used, Carte Fini carries almost a dozen pinks alone, so it was hard to limit myself! I used 580 (coral, a true red/orange), 550 (pink peony), 583 (peach sorbet), 601 (salmon), 549 (pink tulip), 548 (baby pink, one of my favorites), 551 (hot pink, for my confetti), and 803 (red metallic). I was like a kid in a candy store when I placed my paper order for this project.
Let's get started!
We will be using love notes and confetti only in the most piñata-like of the hearts, the ones that are most easily smashed apart. If you plan on making those, make yourself a pile of confetti by stretching out ribbons of different colored crepe paper and cutting them into small squares.

TO MAKE THE HEART SHAPED EGGS:
Turning the eggs into hearts is fun. Start by selecting two blown out eggs which are roughly the same size and shape. Pick away at the bottom and side of one egg until you can fit the other egg into it. The geometry of an egg is surprisingly complex! You'll have to just keep picking at the one egg and trying to fit the other one inside until eventually they nestle beautifully and you're left with a heart.

If you will be filling the egg with a love note (mine says "Please don't break my heart", get it?) and confetti, do that at this point. Fill only the egg that hasn't been picked apart, using the bottom opening as shown below. Fit the eggs back together into a heart shape after filling.

Next you'll want to glue the two eggs together. Run a little bit of hot glue over every crack and seam, using the hot edge of the glue gun tip to smooth down any beads of glue. Before you glue the top of the heart closed, cut a loop of twine and insert it into the crack at the top center of the heart. Then you can glue the top closed and secure the twine hanger so it is centered on the heart. Done!


TO MAKE HEART TYPE A (trimmed fringe heart): 
Gather two different colors of crepe paper, the heart-shaped egg (with or without confetti or love note) and the tacky glue. Cut a strip from the color you would like at the exposed bottom of the heart and stretch it out all the way. The paper is strong and it can take very hard stretching. I always run it along the edge of my work surface to make sure it's nice and smooth. Cut a large oblong shape from the stretched paper, coat one side with tacky glue (applied with a paint brush) and smooth onto the bottom of the eggs to cover that entire bottom area of the heart.

Prepare fringe by cutting and stretching long ribbons of crepe paper, folding over and snipping into fringe as shown. It is quicker work if you prepare your fringe ahead of time, and small scissors (like those for children) work better than large scissors. Apply glue along the backside of the top of the fringe (along the uncut edge) and glue horizontally at the bottom of the heart. You want the bottom of this layer of fringe to extend just a tad past the bottom of the egg heart itself. Continue with layer after layer of fringe, moving up a little less than 1/8" each time until you get to the top of the heart. Finish the top of the heart as shown below.


Now give that heart a haircut! Using VERY sharp scissors, trim the fringe into a point at the front and back surfaces of the heart. Take your time to get it trimmed just right and looking like a heart. As a final touch, fluff up the top haunches of the heart to get a pretty heart shape. Super cute!


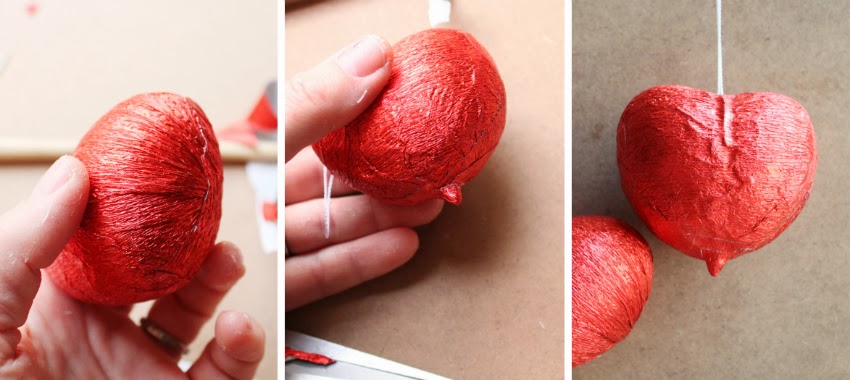
TO MAKE HEART TYPE B (foil-covered heart):
Start by cutting out a 4" x 4" square of red metallic crepe paper. Stretch it out until it has doubled in size and is very smooth, then cut that in half. You will need only one half, reserve the other half for another heart. Using an upholstery needle, poke a hole in the center of the square of metallic paper.
Thread the hanger through the same needle and set the egg aside for a moment. Coat the back of the paper with tacky glue. I want to note here that you can coat the egg instead of the paper, but I have found that weakens the egg shell. Push the needle through the hole in the paper so that the hanger pops out through the hole.


Start smoothing down the metallic paper with your fingers on both the front and back of the heart. A little extra smoothing is good, because the paper heats up a bit like foil and smooths nicely. Don't rub too, too much or the color might start to come off a bit. Apply more glue if you missed any spots and smooth the paper to the outer perimeter of the heart. Trim off most of the excess paper, leaving about an 1/8" around the edges and a little more at the bottom if you'd like to create a point. Smooth one side of the paper down onto the egg, then the other. There will probably be a bump or two, and definitely a visible seam, but I don't think that detracts much from the overall look of the foil heart. Carefully twist the bottom to a point if so desired and smooth the paper as much as you can. I love this one because it looks like a real Valentine's Day chocolate!
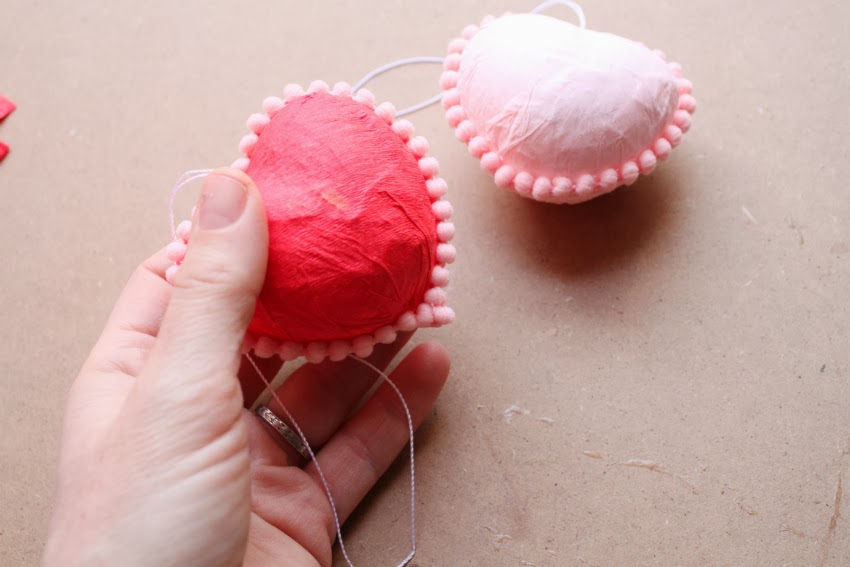
TO MAKE HEART TYPE C (solid color heart with trim):
Follow the tutorial for type B above, but use two layers of stretched out non-metallic crepe paper for better coverage. Thread the hanger through the hole in the paper and trim the edges like above. Fold the edges and secure to sides of heart with tacky glue.
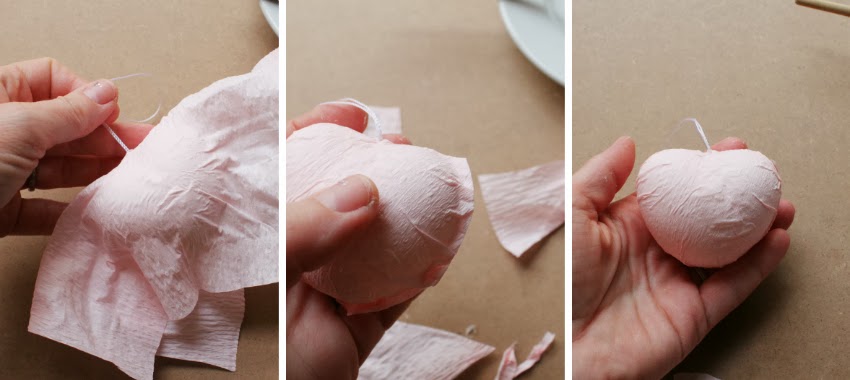
After the second layer of crepe paper has been glued and smoothed onto the egg heart, hot glue your ribbon or pompom trim around the outer perimeter of the heart, a little at a time. You can shape the ribbon at the bottom of the heart to be more pointed if you'd like.
TO MAKE HEART TYPE D (top to bottom in fringe with no trimming)
For this last valentine, prepare the desired color fringe as shown above in type A. Cut a 1" diameter circle out of a piece of chip board, slit one radius in it, then glue to secure like a little flat cone. Glue to the very bottom of the egg heart.

As with all matters of the heart, it was a little complicated getting the fringe just right, but I think I found the trick. Using tacky glue, attach the fringe at the very bottom of the egg going in a front to back pattern. The very bottom fringe should cross about 3/4" of the bottom of the egg. This insures there will be a fringed tip at the bottom of the heart. Follow this elongated pattern with each row of fringe, eventually the fringe will start being wider across the face of the heart as it goes up. Bring fringe all the way up to the top around the hanger and fluff to make a perfect heart shape, again like in type A.

They are kind of perfect, aren't they? The colors make them so special I hope you love them, and I hope you all have a great Valentine's Day! Thank you for stopping by here at The Crepe Paper Store!
Disclaimer:
This tutorial should not be used for any commercial purpose. We appreciate your understanding.